
Who doesn’t love Mac & Cheese?
I mean, I guess people who don’t like cheese… but I try not to think about those kinds of people. (I’ve met a few) I feel like cheese can bring people together, especially in this out of control world we live in right now. I mean, my daughter practically lives off cheese sticks. Who doesn’t want something cheesy, melty, salty, and oh-so-gooey — especially when paired with noodles!
This recipe is perfect for busy nights when you need something comforting but easy, or when your dinner plans suddenly change — like mine did tonight. I was all set to make enchiladas with leftover rotisserie chicken… but when I went to grab it, it had mysteriously disappeared. (Thanks, husband!)
Luckily, I had just gotten my grocery order, and Mac & Cheese was the next best (and maybe even better) option.
I feel like everyone has their own way of making Mac & Cheese, and I’ve tried it all — different cheeses, different noodles, adding chicken, bacon, vegetables… you name it.
Tonight’s version turned out so good I had to share it. I started with an online recipe but ended up adjusting quite a bit. And honestly? It’s my favorite one yet.
Ingredients for Mac and Cheese
- 1 box of pasta (elbows, shells, or whatever you love)
- 1 stick of butter, divided in half
- 1/4 cup flour
- 2 blocks of cheese, shredded. (This time I used cheddar, and Gouda…. But use what you have or enjoy)
- Salt and pepper to taste
- Fresh grated of nutmeg (optional, but highly recommended)
Ingredients for Crumb Topping
- 1 cup crushed crackers (like Ritz, I used one stay fresh pack)
- 1½ cup panko breadcrumbs
- 1Tbsp Italian Seasoning
- 1/2Tbsp Paprika
- Remaining 1/2 stick of Butter
Instructions for Cheesy Goodness
(Side note: I always ask myself if I should label this “Instructions” or “Directions” — I guess either works, but “Directions” makes me think of driving somewhere and I promise you don’t need a GPS to find the ingredients you need for this.)
1. Boil the Pasta
Boil your noodles in salted water until al dente.
Remove from heat, strain, and set aside.
2. Make the Cheese Sauce
Melt half a stick of butter in a Dutch oven or other oven-safe pot.
Once melted, whisk in the flour.
Cook over medium-low heat for 4–7 minutes. (I like mine a little darker for a nuttier flavor.)
Lower the heat and let the béchamel cook while you grate your cheeses.
(Fun fact: A béchamel is one of the “Mother sauces” of the culinary world! — you’re basically a pro now!)
3. Add the Cheese
Bring the heat back up slightly (medium-low).
Add your shredded cheese a few handfuls at a time, stirring gently after each addition.

Season with salt and pepper to taste.
(If you have white pepper, now’s the perfect time to use it — no black specks!)
4. Secret Flavor Hack
Grate a little fresh nutmeg into the cheese sauce.
It adds a cozy little umph! (I learned this from Good Eats with Alton Brown — he even keeps nutmeg in his pocket!)
5. Assemble
Taste-test the cheese sauce — quality control, obviously!
Pour the sauce over your noodles in a baking dish, or stir the noodles directly into the Dutch oven if you’re using one.

6. Make the Crumb Topping
Melt the remaining half stick of butter in the microwave.
Crush your crackers (this is a super fun step for kids!).
Mix the crushed crackers and panko into the melted butter.
Add a sprinkle of Italian seasoning and paprika.
Stir to combine.
7. Bake
Sprinkle the crumb mixture over the top of the Mac & Cheese.
Bake at 350°F for about 30 minutes, or until the top is golden brown and the sides are bubbly.

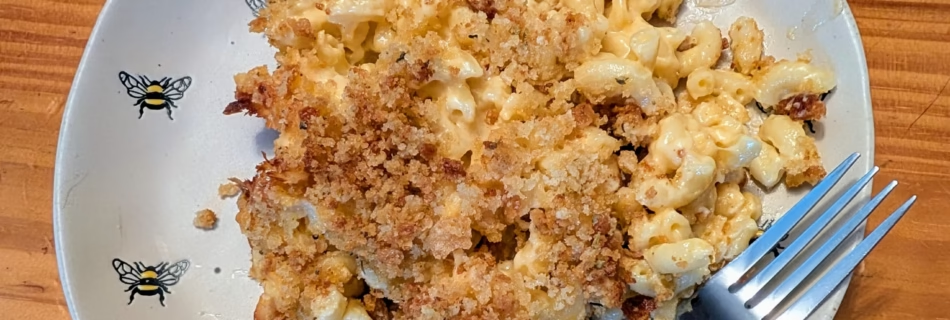
Final Thoughts on this Mac
And there you have it — cheesy, cozy perfection.
Honestly, this might be my favorite way to make Mac & Cheese yet. Perfect for a weeknight dinner, a cozy Sunday meal, or anytime you just need a little cheesy happiness.
If you try it, let me know how it turns out! (Bonus points if you add bacon… just saying.)

